Virtual Staging (by swapping elements)


Tour Description:
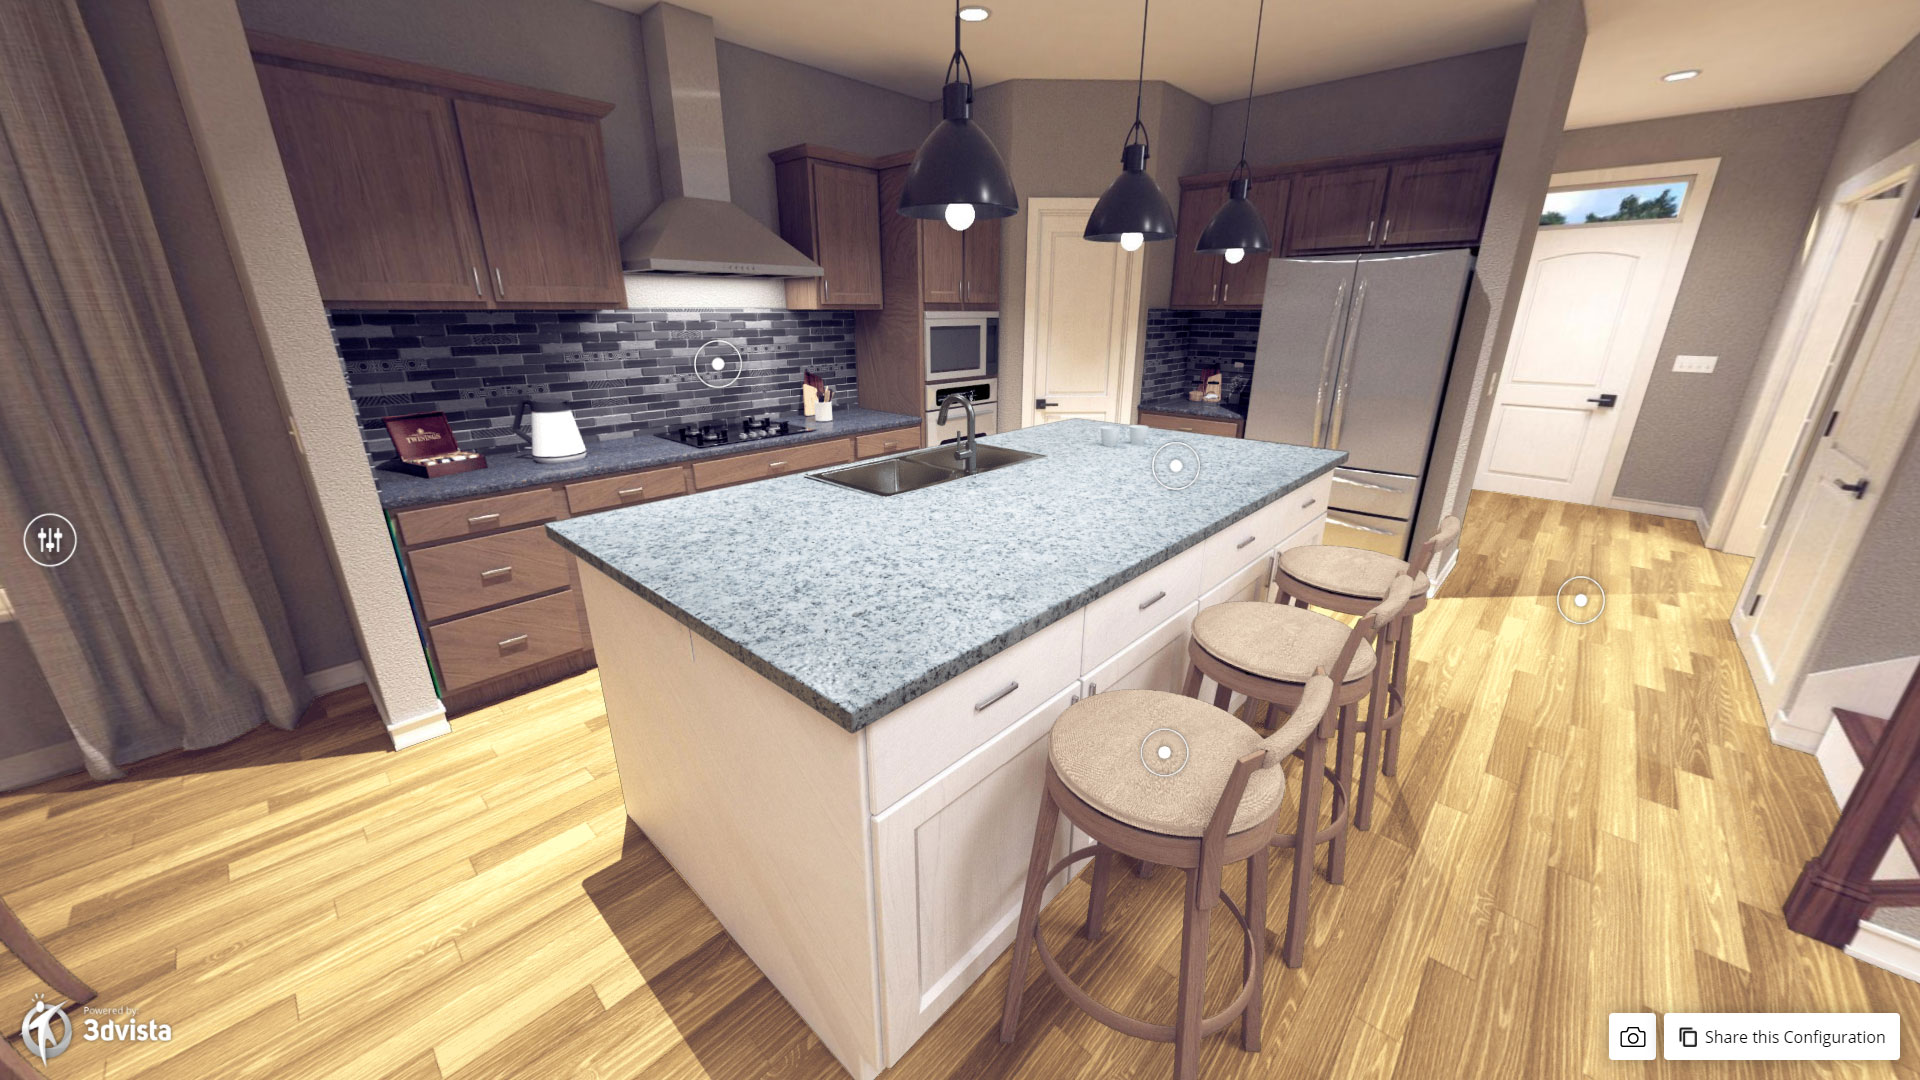
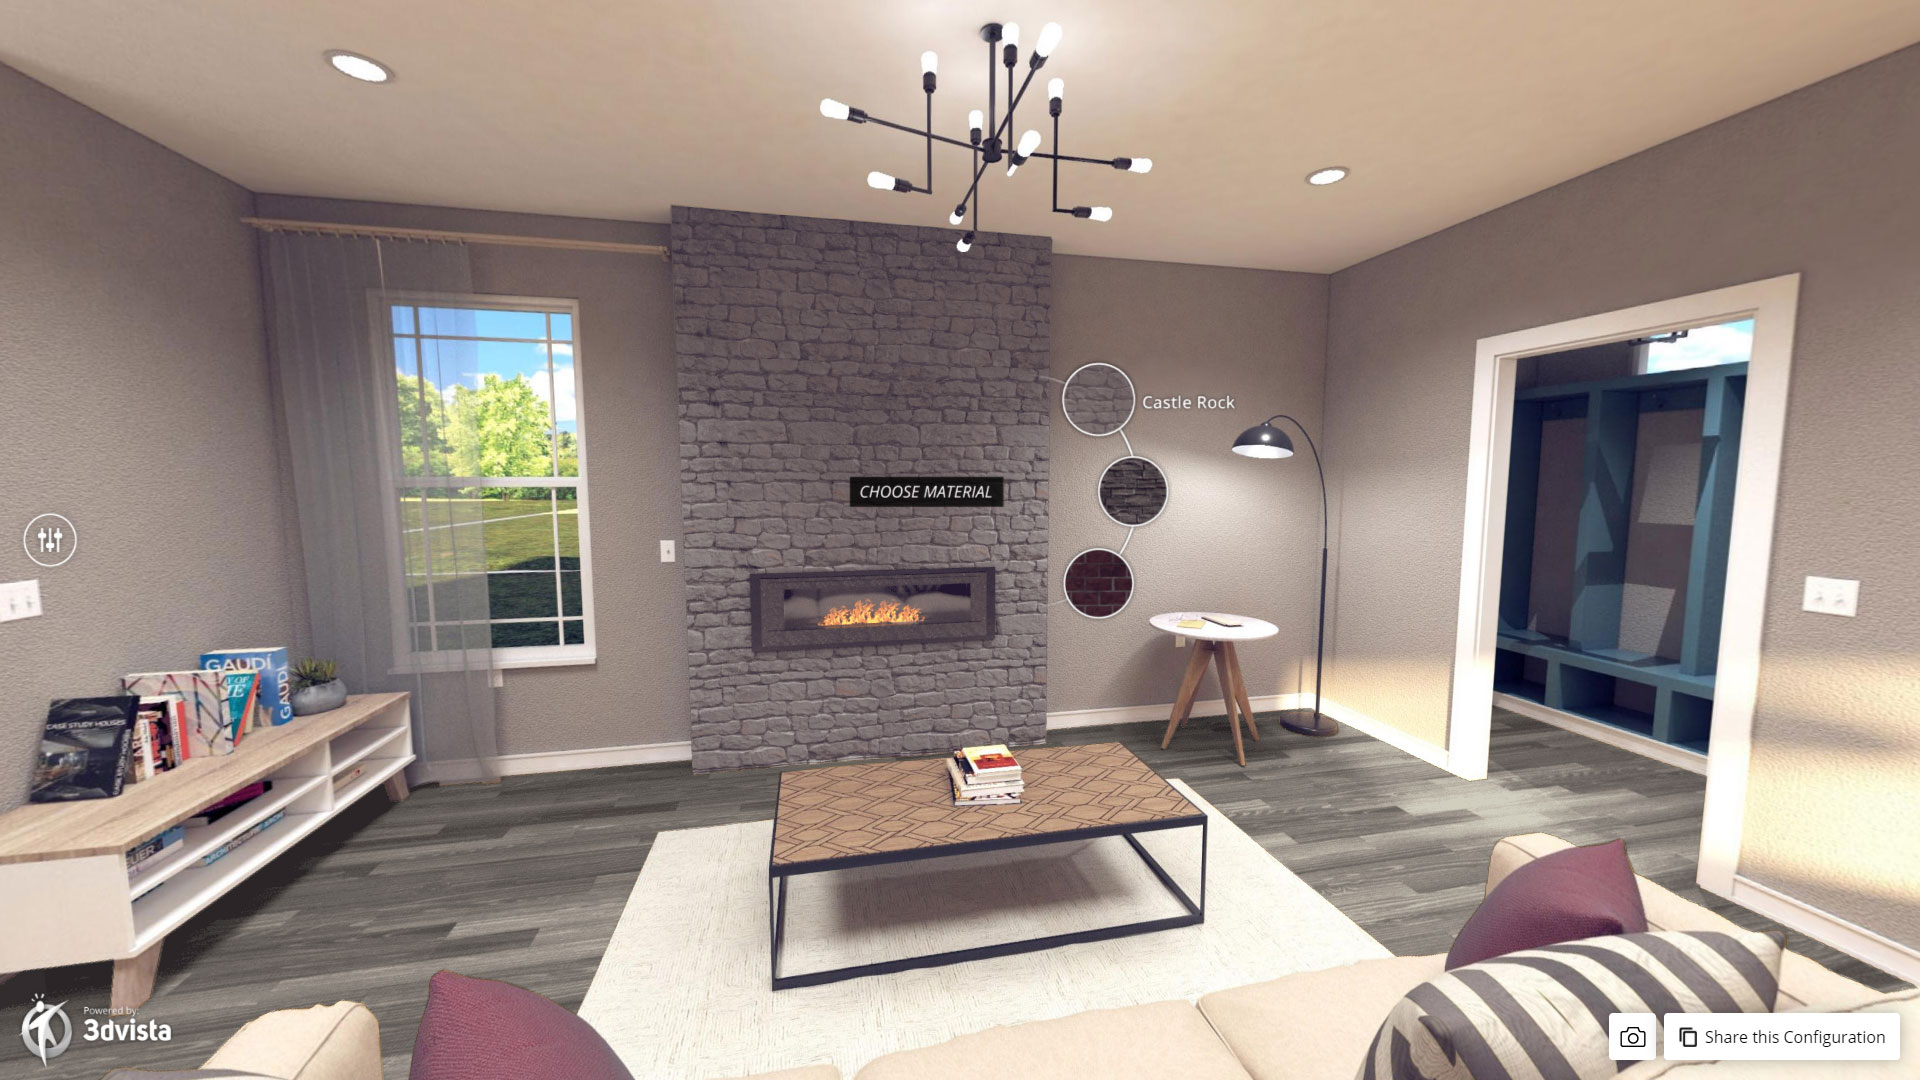
Choose the finish you like best for each item and see how it combines to create the "perfect" kitchen. This is a small demo to show the possibilities of Virtual Staging in 3DVista VT Pro.
Thanks to the new "projected image" hotspot type, it is now possible to display endless combinations of virtual staging with just one single underlying panorama. With perfectly fitting layers of elements that can be mixed and matched inside the panorama to visualize endless combinations of layouts, you save yourself the work of having to render hundreds of the same panoramas with all possible combinations. A life-saver!
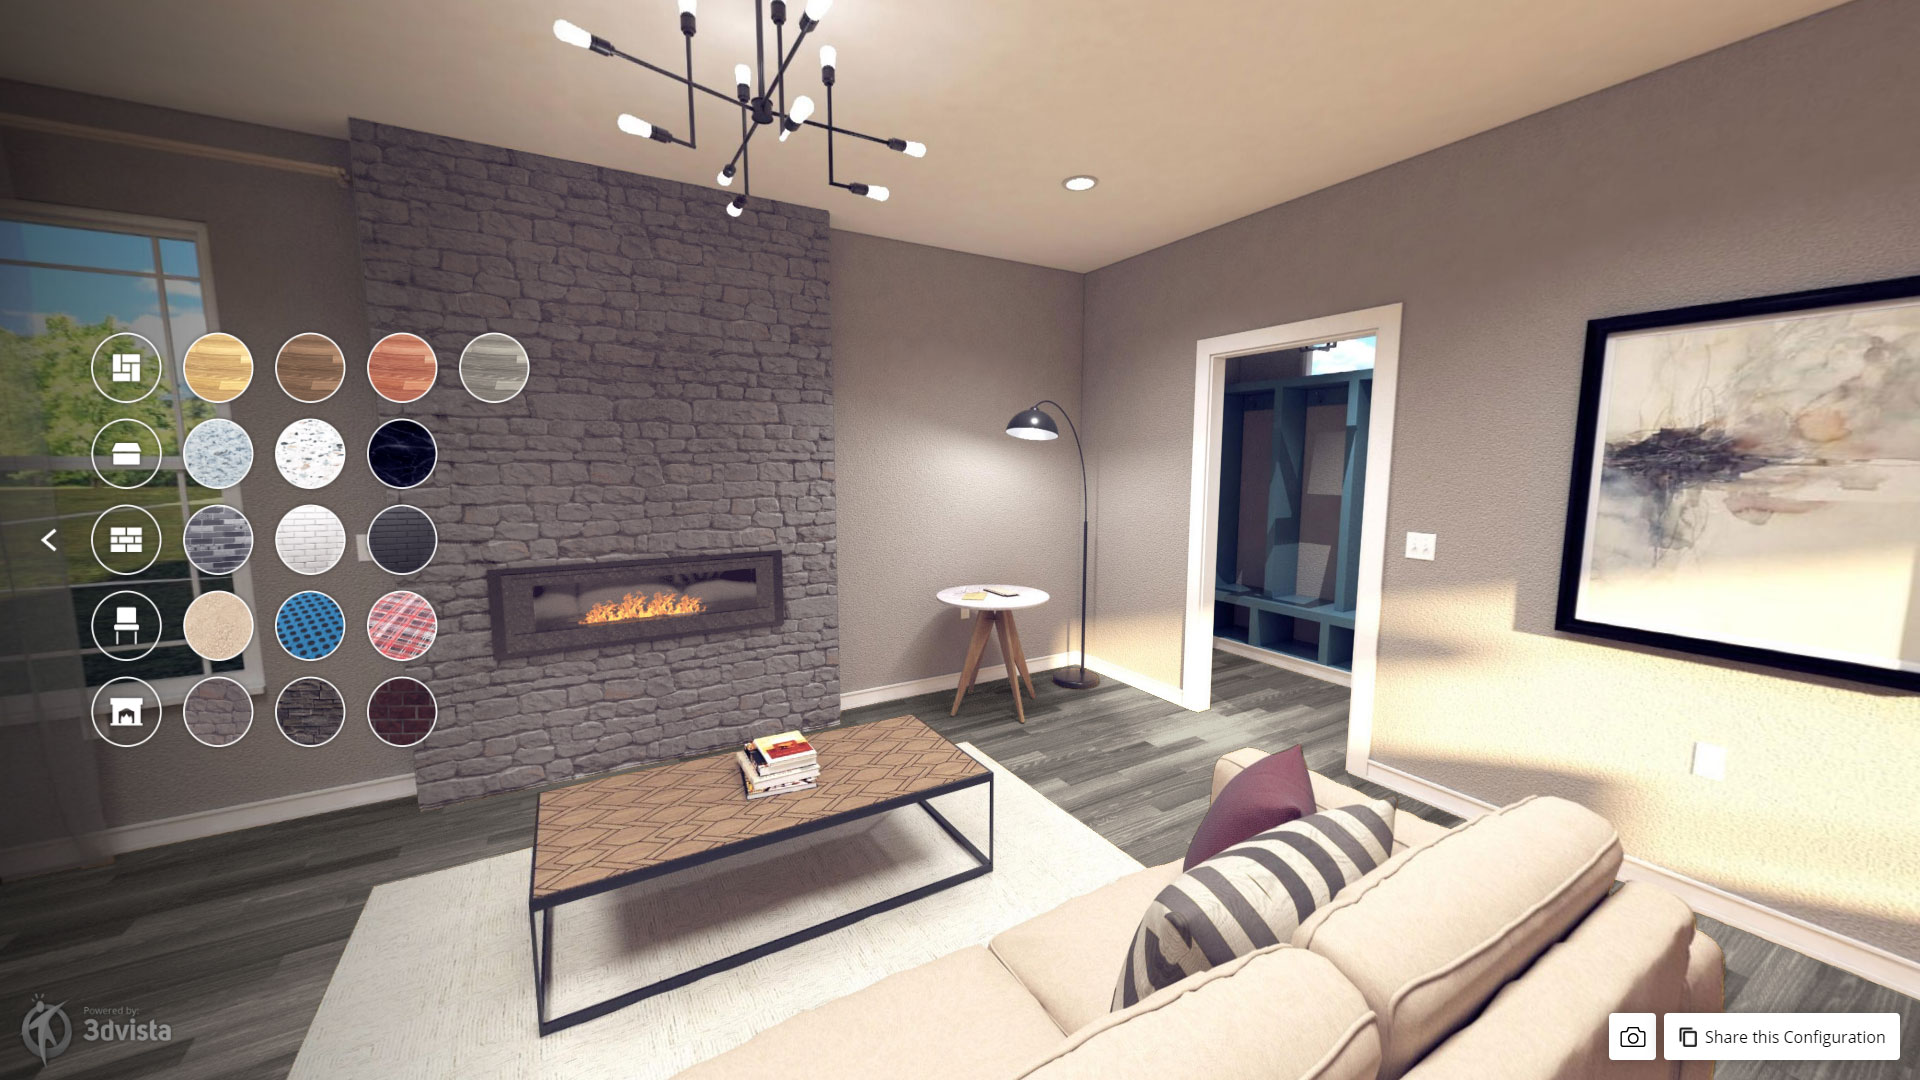
For this project, we exported one panorama with a basic element configuration from a 3D model created in Cinema 4D. Later, for each element (floor, countertops, fireplace …) variations of materials were made that were exported as independent images. We imported the base panorama in VT Pro and with the new hotspot type "projected image", added the different combinations of each element as groups of hotspots, so that only adjusting one of them (for example the black floor) the other types of floors were automatically placed in the same exact position. In addition, this hotspot type adopts and maintains the exact same projection as the base panorama. This leaves us with a group of hotspots for the floor, another one for the countertops, and one for the countertop wall / backsplash, chair upholstery and fireplace wall respectively. This new approach makes it possible to manage elements or combinations of this type much more effectively and keeps your tours significantly smaller in size. The advantages are huge. We no longer need exponential numbers of full panoramas of the same space to depict the numerous combinations of elements and materials, which would lead to skyrocketing time and costs for rendering, tour storage and loading times. Instead, we only need one basic panorama, the rest are small hotspots that are simply turned on or off.
We created several ways in which a visitor can click through and switch between the different materials, the simplest being to click directly on the area in question and through successive clicks, alternate between the materials. You can hover over the area to make an animated menu appear which lets you select one of the depicted materials. Or you can opt for a complete menu designed in the skin, which in a floating way is superimposed on the panorama and allows to adjust all the elements at once and from one place, the configurator. Which option you prefer, is up to you.
An adapted version of the skin has been created for viewing on mobile, which allows better interaction with the menu and buttons, and simplifies the pressing of the elements to change the material. So make sure to check the tour on mobile, too.
For the very first time, we also applied two more new functions that are very useful in this type of project. The first one is the possibility of taking a "screenshot" of the exact view we have of the tour. You'll see a small camera button, which when being clicked acts as if we were taking a photo, which is automatically downloaded as an image file for you to save, share, etc. The second function is "Share this configuration". What this does is, it copies the url of the tour to the clipboard, including the exact current parameters that indicate which panorama and hotspots or elements we are viewing, and the exact position of the camera. This way, we can share our tour with others, but with the specific combination and configuration that we have made and chosen (for example, share the kitchen panorama with a "red oak" floor, with "black granite" countertop, "Beige Leather" upholstery) and thus be able to comment on and analyze it, without room for confusion.
The tour can be viewed in VR, so that the changes applied can be experienced in a much more authentic way. And the applied material selection is much better perceived by having the feeling of being physically in the room and feeling how each material selection changes in a space that truly surrounds us.
In short, a sample of the possibilities that 3DVista technology can offer to design, decoration and architecture. Try it now and let your audience select and configure a space in the best and most intuitive way – by testing and visualizing combinations in their actual 360º environment and in relation to each other.
Includes:
- CAD Renders
- Virtual Staging
- Precision Hotspots
- VR
- Dual Skin
Related Tutorial:

Tutorial on Virtual Staging (by swapping panoramas)
Post Blog:


Virtual tours with Photos or CAD Renders
